#b2s 1. Create a spreadsheet for student information
This is part 1 of 13 things to do before the first day of school
For a lot of scenarios, creating a Google Form to collect information works well. But it could also be overkill to create a form just to collect a student’s username from a web service, or to have a student select a date to present. By sharing a Google Sheet with a class and selectively setting areas to read/write while keeping other cells read only, a teacher can collect and share this information with the class.
The way I’m going to show you how to do this doesn’t protect cells from being overwritten by mischievous students, but a look into the Sheet’s revision history will let you know who is messing with the Sheet.
Step 1 – Create a sheet
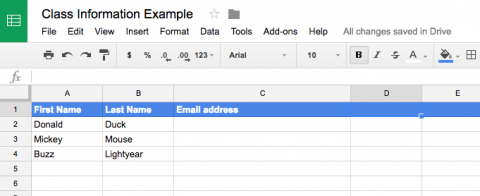
The sheet can start with a header with the student’s first name, last name, and email address. As the teacher, you would fill in the first name and last name, but email address would be blank.
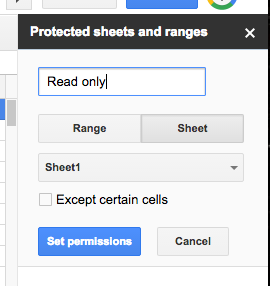
Step 2 – Protect the sheet, except for certain cells
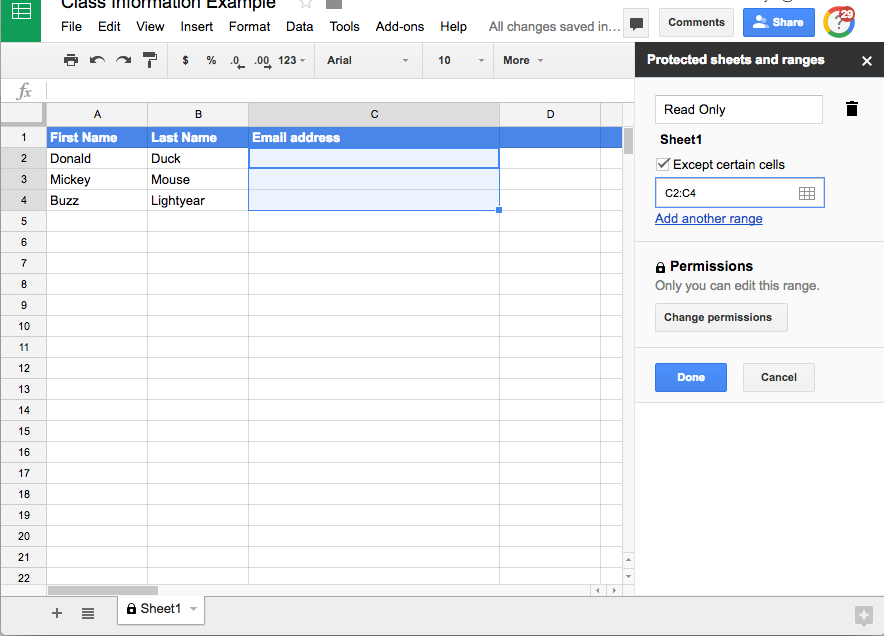
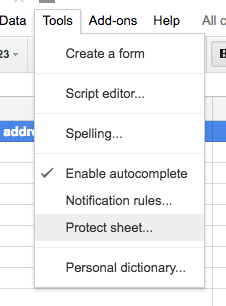
Navigate to the Tools menu and select Protect Sheet…
Enter a description, I usually use Read Only.
Then click Set Permissions. From the Range editing permissions dialog, set Restrict who can edit this range to Only you.
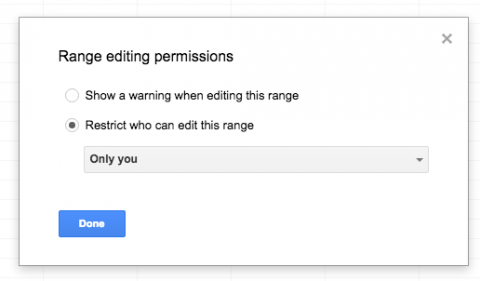
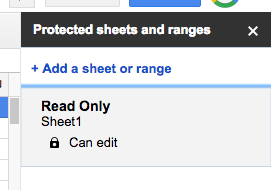
After clicking Done, you’ve just set the sheet to be read-only for everyone else, even if the sheet is shared with edit privileges. Now, on the right side, click back on the Read Only range.
Now the magic is going to happen. Check the box beside Except certain cells.
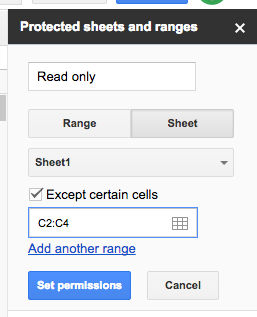
By clicking on the 9 box icon beside the range, you can then select the range in the sheet instead of typing it.
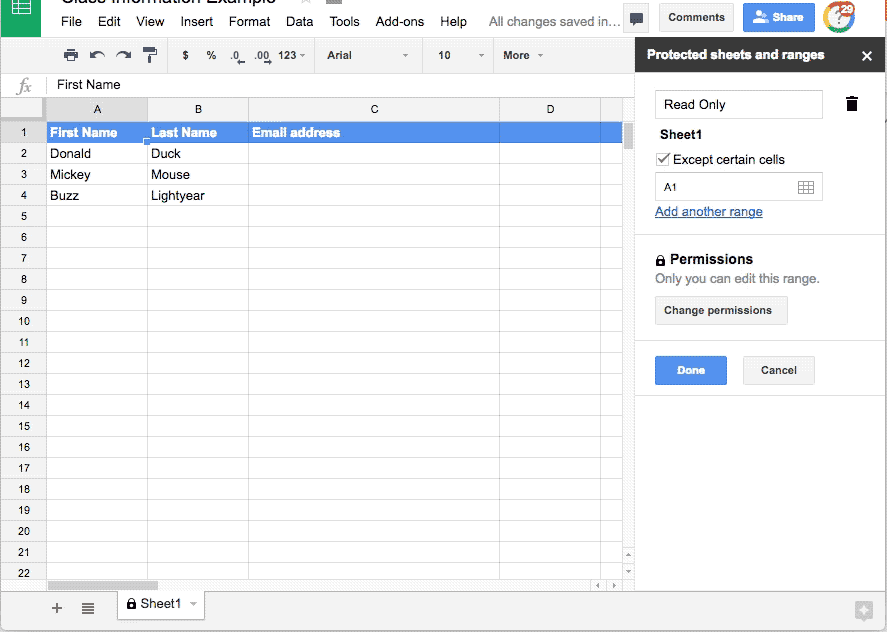
Click OK. Now the entire sheet is read only, except for the range C2:C4, which can be edited by anyone the sheet is shared with.
Step 3 – Share the sheet with your class
Now share the sheet with your class, and be sure to give them edit access. They can now enter information only in the cells you allow.
Step 4 – Adding ranges
By clicking on Add another range, you can add multiple ranges to the sheet. For example, maybe you want to collect the student’s username. Add another column header called Twitter, then click Add another range and add that range. The students should then have access to those cells.