Using Gmail as a Journal
I’ve tried various ways to keep a journal, and right now I use both Gmail and WordPress to journal. For today, I’m going to focus on using Gmail to journal.

The workflow for using Gmail to journal is pretty simple. To add a journal entry, you will email a special address. To delete an entry, you’ll delete the message in Gmail. Unfortunately, there is no way to edit or append to a journal entry.
To get started, we’re going to use plus addressing. Gmail allows you to use plus addressing, which means you can append +word to your Gmail username, such as [email protected] (replace USERNAME with your Gmail username). Why? Because you can filter incoming emails based on the To: and keep the journal entries out of your inbox.
So our emails will be sent to [email protected]. Before we can start using it, we should set up a filter. Click on the Gear icon and select Settings.
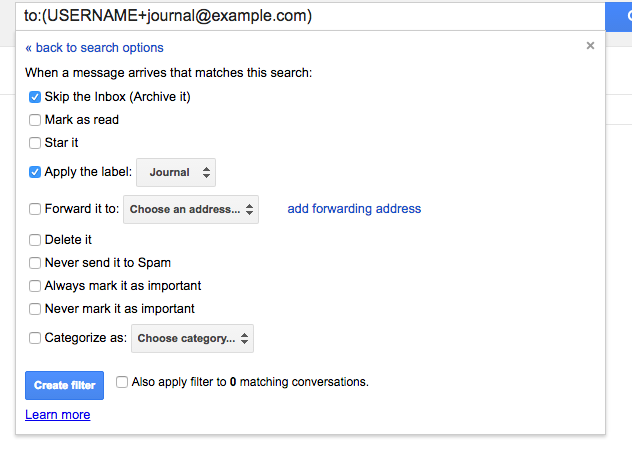
Go to filters, and add a filter based on to:[email protected].
Under the settings for the filter, click Archive, Skip the inbox.
Now, any emails sent to your journal email address will automatically be archived and not clutter up your inbox.
Later, to review your journal, use a Gmail search for to:[email protected]. All of your journal items will show up.
This journalling technique works really well for quick notes also. I will send an entry after bumping into people in the hall if we discuss anything work related. Now I can search for that person in my email if I need to recall the notes from our chance meeting.