Adding a timer to Google Slides
Yesterday I talked about using Google Forms and Google Slides for exit or entry tickets. One addition I like is adding a timer to Google slides in the form of a countdown timer.
By adding a timer the students and you get a sense of completion for the current task or project. Without the timer it might be harder to refocus the class and move on. The timer also works well when you are presenting to the class and would like the students to discuss a particular question or slide. By adding a timer to Google Slides, the students will get a sense of how much time they have left and be able to focus and transition on to other tasks easier.
I’ve also put together a video showing you the steps for adding a timer to Google slides.
Adding a timer to Google Slides
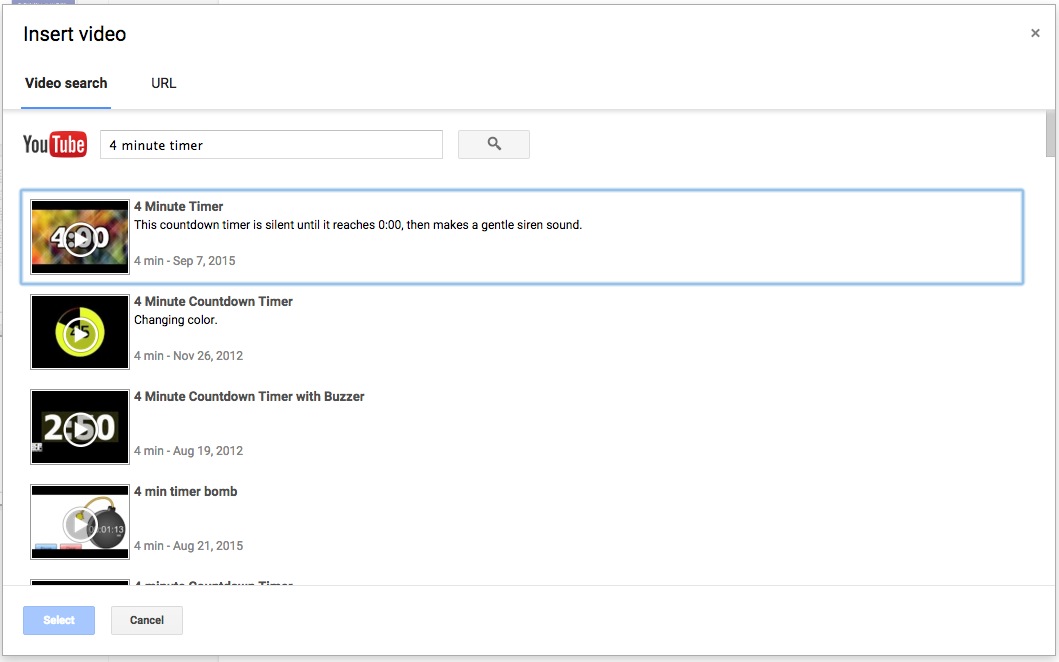
It’s relatively easy. In Google Slides, go to Insert -> Video. In the search, enter the length of the timer you want, like 4 minute timer. Luckily for us, there are tons of timer movies already on Youtube. Be sure to check the timer’s ending, some of them may be inappropriate for school, such as timers that depict a bomb.

Resize the video and place it in the corner of your slide. When presenting, click it to start the timer. This technique could be used for other parts of a presentation, for example, if you wanted the group to discuss an item, you could have a 10 minute time on the slide.
In the classroom
I resize the timer to fit on part of the slide. The remaining portion of the slide shows the questions that I would like the students to be discussing or answering at the moment. Without adding a timer to Google Slides I would be required to juggle multiple windows or have a separate timer that may not be visible to the students. With the timer embedded on the slide I don’t interrupt the flow of class.