Getting started with bookmarks – A great time saving tip!
Getting started with bookmarks is one of the best time saving tips you can learn. Sure, it’s not one of the most talked about features, but it is a feature that is guaranteed to save you time! In fact, I’ve mentioned it several times in the past.
With a bookmark, you can jump directly to a page of a site without doing searches or clicking around,
There is one caveat on setting up your bookmarks. Check to make sure you are signed in to the browser. With Chrome, there will be an icon to the left of the three line (or dot menu):
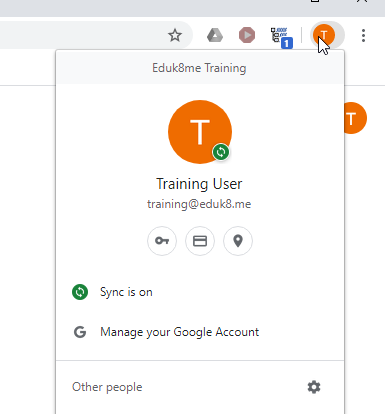
The menu will also show that sync is on. Your bookmarks will be synced among all of the Chrome browsers you sign into with this account and also be available at https://bookmarks.google.com (if you are using a school Google account, you may need to have your Google Admin turn on this feature.
Getting started with bookmarks
Since you are reading this far, I’m going to infer that you are using Google Chrome. Even if you are not, the concepts are the same. Every browser can save a website as a bookmark. You can then go back to that website by clicking on the bookmark. The quickest way for getting started with bookmarks is to save a bookmark with control-d or click on the star in the address bar.
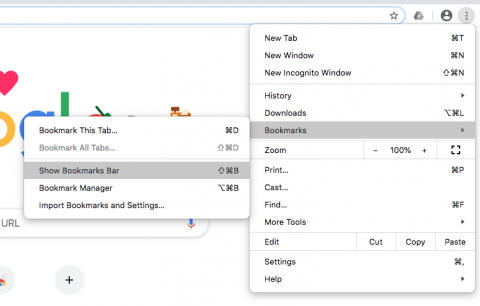
The bookmarks are organized in to folders, which you can organize how you see fit. Fortunately, there is the automatically create Bookmarks Bar folder. Links saved here show up under the address bar when Show Bookmarks Bar is enabled. If the bookmarks bar isn’t being shown, it can be turned on under the three dot menu.
Once the Bookmarks Bar is enabled, you can drag items to the Bookmarks Bar to organize them. That’s the easiest way to add or manage your bookmarks.
Editing
After dragging the address, the name will be set to the title of the webpage. Unfortunately, that means you’ll get weird names of the bookmarks. To rename the bookmark, you right click on the icon and select Edit from the menu. To right click on laptops, use two fingers on the trackpad.
To move a bookmark or folder, click and drag on the bookmark or folder and put the bookmark or folder where you want it.
Folders
Once you’ve added a few different bookmarks, you start running out of space. This is where folders can come in handy. To create a folder, right-click on the bookmarks bar and select Add Folder. Name the folder and click Save. Now you can click and drag bookmarks or folders into your newly created folder.
Then drag & drop a bookmark into the folder.
Deleting a bookmark or folder
By this point, the directions to delete a bookmark or folder are going to seem pretty familiar. Right-click on the bookmark or folder and select delete.
Be forewarned, Google Chrome does not ask for confirmation before deleting. This also means that if you delete a folder with bookmarks in it, all bookmarks in the folder will be deleted!
Bonus – Quickly create Google Docs, Sheets, or Slides documents
There are shortcuts created by Google to help you quickly create a Google Docs, Sheets, or Slides document:
- https://docs.new
- https://slides.new
- https://sheets.new
If you type those into your address bar, you’ll end up with a brand new document. You can’t bookmark the new document, because then you’ll get a link to that specific document. There is a way to add those quick create shortcuts.
Right-click in the Bookmarks Bar and select Add Page. Enter the name for the bookmark, such as New Doc into the Name field, and the address https://docs.new into the URL field. Hit Save and you have a bookmark to quickly create a new Google Docs document. Continue for the other two file types and you’ll have three bookmarks. These bookmarks can be organized in folders.
Putting it all together
Here’s a video demonstrating all of the techniques I talked about above.