11. Journal (from 13 Gmail hacks for teachers – http://u.eduk8.me/13gmailhacks)
This is part 11 of 13 Gmail hacks for teachers.
I’ll be the first one to tell you my memory is terrible, especially with interactions during the day. Of course at the moment I believe I’ll remember it, but a day later and it’s already gone. This is my reason for setting up a journal with Gmail.
Why use Gmail for journalling?
I was evaluating ways to document tasks completed at work. My criteria was that it had to be highly automated, and that I could easily add to it from any device. Gmail fits this criteria. I can automatically filter some emails and also send emails.
Create a label for the Journal
First step is to create a label for all your messages that will consist of your journal. On the left side by your labels, mouse over the labels and scroll to the bottom of the list.
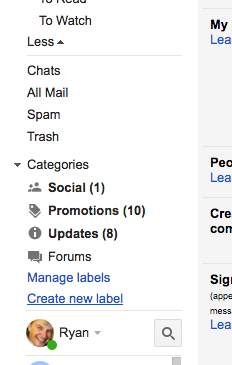
You may have to click More to see the link to create a new label. Click it and create a Journal label.
Set up a filter
Now we are going to set up a filter. But how will we be able to filter messages automatically to the Journal label? Through the magic of +aliases in email addresses. Go to Settings in Gmail and click on Filters.

Click on Create a new filter. In the To: field you are going to put your current email address, except you’re going to ad +journal between your username and the @ sign.
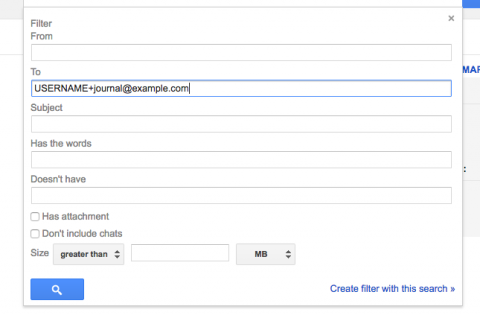
So if your email address is [email protected], you’ll search on username+journal@example.com. Click Create filter with this search.
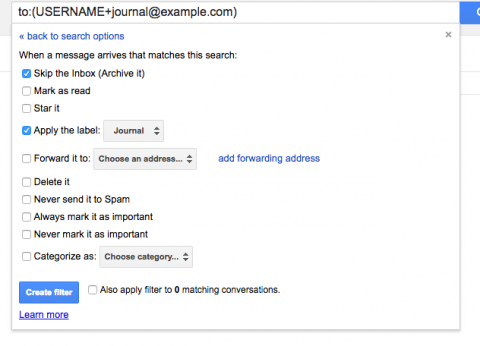
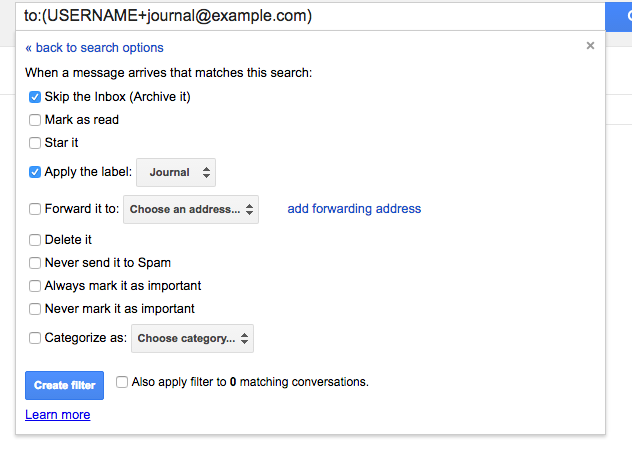
Check Skip Inbox and set the filter to apply the label Journal.
Using
To use your new journalling setup, send email to your journal address, in our example it’s [email protected]. These emails will be automatically labeled with Journal. To view your journal, click on the label. You can also apply all of the searches in Gmail to your journal label with in:journal as one of your search terms. With in:journal, Gmail will only search items in the journal label.
