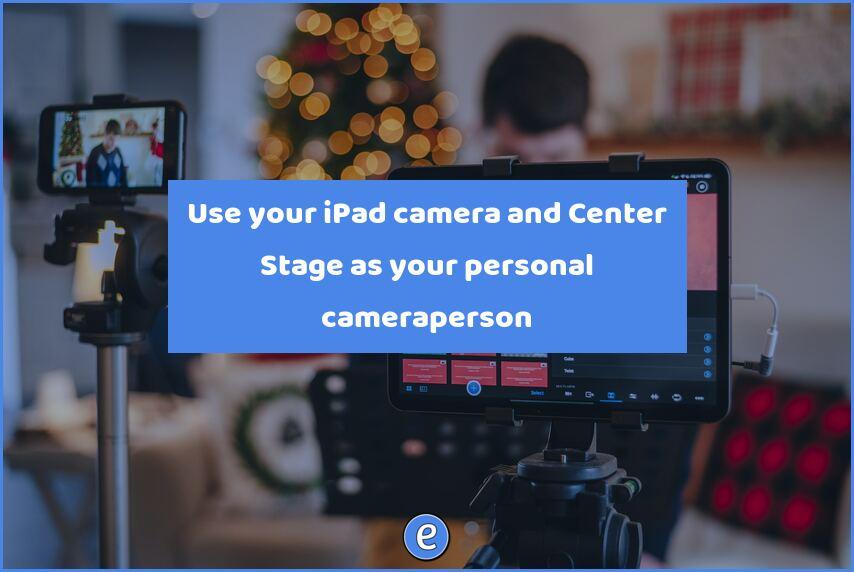
Use your iPad camera and Center Stage as your personal cameraperson
Center Stage is a camera feature built in to several iPad models that uses software and the front facing camera to track a person and keep them in the center of view. It will track multiple people, zooming out when necessary to keep both in the field of view.
Why Center Stage
You may have seen or used devices such as the Swivl which manually move the camera to track the user and keep them in the center of the screen. Apple’s Center Stage can do the same without any additional hardware.
Using and limitations
While most of the use cases are on how to use Center Stage during video conference calls, there is a way to use it as a camera that tracks you. My example is going to be on using the iPad as a camera to your computer and capturing a screencast using your screencasting software of choice.
Unfortunately, the built in Camera app on the iPad can’t take advantage of Center Stage, so you can’t use it to record you.
With an iPad and Center Stage you can teach a lesson at the front of the room, recording yourself along with whatever you are presenting, and the camera will follow you.
One piece of equipment you will need is something to hold the iPad. My case works pretty well, but there are also tripod mounts available. And in a pinch you can prop it up with some books. Remember, it doesn’t need to move, it will track you!
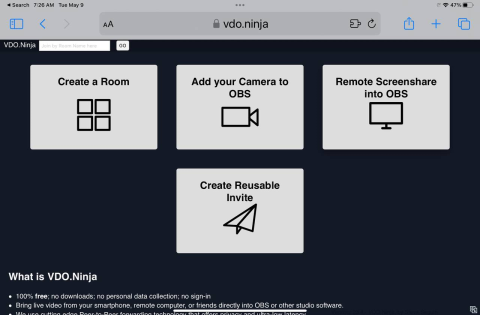
vdo.ninja
VDO.ninja is such a useful tool. It allows you to broadcast the camera on your phone or tablet to a computer on your network. It does this without any software to install. I’ve talked about it before with my video on using your smartphone as a document camera. We’re going to use almost the same steps to bring the iPad camera to your computer for capture.
On the iPad, start Safari and go to VDO.ninja. From there click Add your Camera to OBS. The site will ask permission to access your camera and microphone.

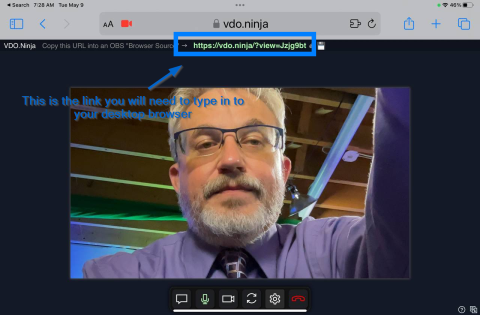
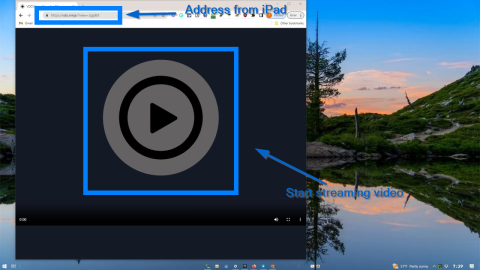
Verify that the video source is on front camera and click Start. At the top of the screen will be the address you will use on your computer. It will look something like `https://vdo.ninja/?view=CODE` where CODE will be a short length of random characters. The good news that the code won’t change, so you can bookmark it on your computer and use it in the future.
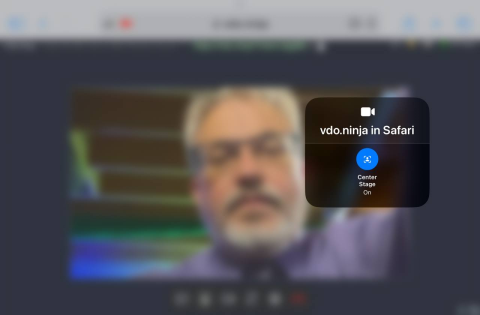
Next, we need to turn on Center Stage. From the upper right, off screen slide down to open up the control center. In the upper left will be a Video Effects button. Tap it and you can turn on Center Stage from here.

On your computer
On your computer, you will navigate to the VDO address. Once there, you will need to click in the page to start the video streaming. You should now see whatever the camera is seeing. This is great, but you also want to present something. I’ve got you covered!
Right click on the video and select Picture-in-picture.
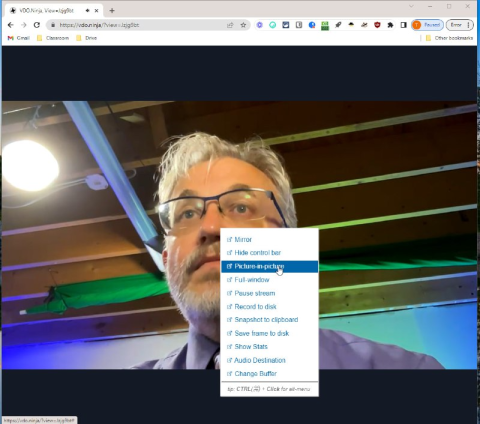
The video will now leave the page and be in a box you can place anywhere on the screen. For example, you can resize it and place it in the bottom right of the screen like how a webcam would be.
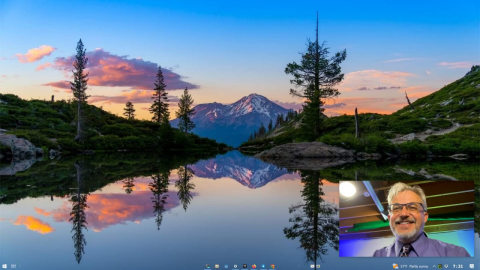
Start up your screencast recording software of choice and select to capture the entire screen. Don’t capture your webcam since we don’t need that. Also, you’ll want to make sure it is set to capture all of the sounds so it can capture the iPad’s microphone. This is the trickiest part, trying to get decent audio. You’ll have to play with capturing from the iPad or from your webcam mic. You can still use the webcam mic even if you aren’t using the camera part.
Finishing up
Now you can record a lesson and have the camera follow you. Depending on your sound set up, the microphone in the iPad might not be the best choice, so you may want to look at other microphone options.