K-2 Word Mapping Google Sheet
Last week I attened the ITIP Ohio Google Summit. One of the sessions I attended was Getting Google-y in K-2 Reading presented by Jazmine Monroe and Becky McDonald. One of their examples was a Google Sheet that was formatting for Word Mapping, using conditional formatting to reflect correct and incorrect answers.
I thought this was really cool, but tedious to make since you had to update all of the conditional formatting formulas. So I set out to create a Sheet that makes setting up this activity easy and quick. Let me introduce you to Eduk8me’s Word Mapping!
To get the most out of the sheet, there is one prerequisite, the Flat Icons extension for Google Docs and Slides. This extension is a great way to add clipart to your Docs, Slides, or Sheets.
Setting it up
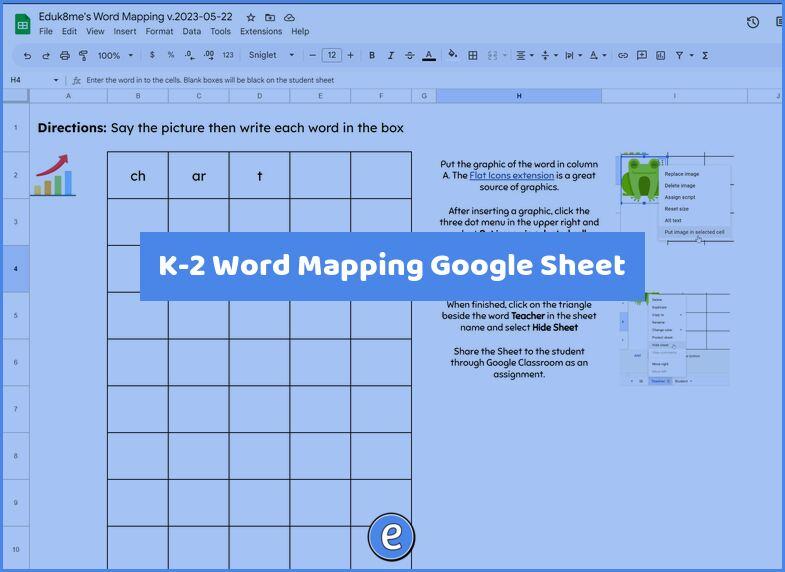
If you want to change the directions, you can do that by clicking on the A1 cell and entering the directions.
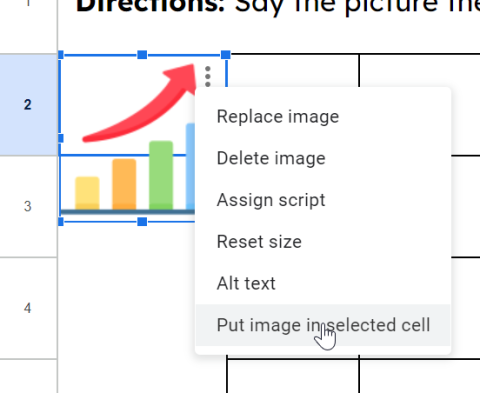
On the first sheet, which is named Teacher you’ll add clipart to the first cell of the row with the Flat Icons extension. After you find the clipart and add it, you’ll click on the three dot menu and Put image in selected row. This will resize the graphic and make it fit.
In the boxes, you can see my first example. Enter the letters you want the student to enter. Any blank boxes will show up as black on the student page.
You don’t have to use all of the rows. Any boxes that don’t have text in them will be black, so you can use as few or as many rows as you want.
Once the teacher sheet is done, you’ll click on the triangle beside the sheet name and Hide sheet. This activity works for younger students but older students may figure out how to show a hidden sheet.
Now you have a sheet you can share out in Google Classroom for your students.
This was fun
This was fun to create! If you have ideas for other activities, let me know!!